Tuesday, November 29, 2011

Artichoke Tart

If you like artichokes, parmesan and feta cheese then this is the dish for you! Savory and tangy, with a creamy polenta crust and bits of parsley and rosemary.
I found the original recipe in "Ancient Grains for Modern Meals" by Maria Speck and only made a few changes to suite my family. I changed one of the cheeses from goat to feta, halved the recipe and made it in mini tart pans and increased the parmesan. Yummy stuff, reminiscent of baked artichoke dip.
I used this as a main course but it would make a good side or cut in wedges an appetizer.

Makes 4- 4inch tarts.
Polenta crust:
3/4 cup of broth, chicken or vegetable
3/4 cup of water
1/2 teaspoon salt
3/4 cup polenta or corn grits
1/3 cup shredded parmesan cheese
1 egg
Filling:
1/2 cup plain Greek yogurt
1 egg
1/4 cup minced onion
1 tablespoon finely minced parsley
2 teaspoons finely minced rosemary
1/4 teaspoon salt
dash black pepper
1  12oz. can artichokes, well drained
2 oz. crumbled feta cheese
1/3 cup shredded parmesan
To make crust:
Bring the broth and water to a boil in a medium saucepan.
Slowly add the polenta in a steady stream, stirring constantly.

Simmer and stir until thick about 10 minutes then put the lid on and set aside for 10 minutes.
Lightly spray tart pans with olive oil.
Spoon polenta into pans, gently pushing up the sides.
Set aside.
To make filling:
Gently stir together all the filling ingredients except the parmesan cheese.


Spoon into the crust.
Top with parmesan.

Bake at 375F. for 25 minutes, until the cheese on top is starting to brown.

Serve with a crisp, green salad or what ever you want, who am I to tell you what to eat.
Delish!

Monday, November 21, 2011

Chocolate Coconut Cake--To Live For!

Can't really say that I would die for a cake, so it's not "to die for", but it was awfully good, wow good.
 I wish I could show you a photo of a plated piece all dolled up with bits of toasted coconut artfully scattered around it, alas it vanished without a photo. I took it to an Oneg event (fellowship meal) so I didn't want to take a piece out before it went, then before I turned around it was gone.
So here is a lesson on taking components you may already have and regrouping to form another wonderful concoction. Here is the list of components.
The chocolate cake was light, airy and rich, I used the recipe on the back of the Hershey's Cocoa box. It is always good and is my "fall back" recipe for any chocolate cake.
The creamy white frosting is the best white frosting I have ever had. I snagged this recipe from Tasty Kitchen http://tastykitchen.com/recipes/desserts/thate28099s-the-best-frosting-ie28099ve-ever-had/   It is light and creamy, not heavy like a butter cream, more like a stable whipped cream texture.
To this add the simple, yet classic, toasted coconut. It dressed it up, added visual appeal and besides that...well, I just love coconut.
The Hershey Recipe
2 cups sugar
1 3/4 cups all purpose flour (I used spelt)
3/4 cup Hershey's cocoa
1 1/2 teaspoons baking powder
1 1/2 teaspoons baking soda
1 teaspoon salt
2 eggs
1 cup milk
1/2 cup oil (I use melted coconut oil, or butter)
2 teaspoons vanilla extract
1 cup boiling water
Butter a 9x13" pan, set aside.
Preheat oven to 350F.
Mix dry ingredients, set aside.
 Add the eggs, milk, oil, and vanilla. Stir until just combined.
  Add the boiling water, stir, pour into prepared pan and bake for 35-40 minutes until a pick comes out clean.
Frosting
5 tablespoons flour
1 cup milk
1 teaspoon vanilla
1 cup softened butter
1 cup granulated sugar, not powdered
While baking, in a small saucepan heat, stirring constantly, the flour and milk until it thickens to a pasty consistency.


 Allow to cool completely before the next step.
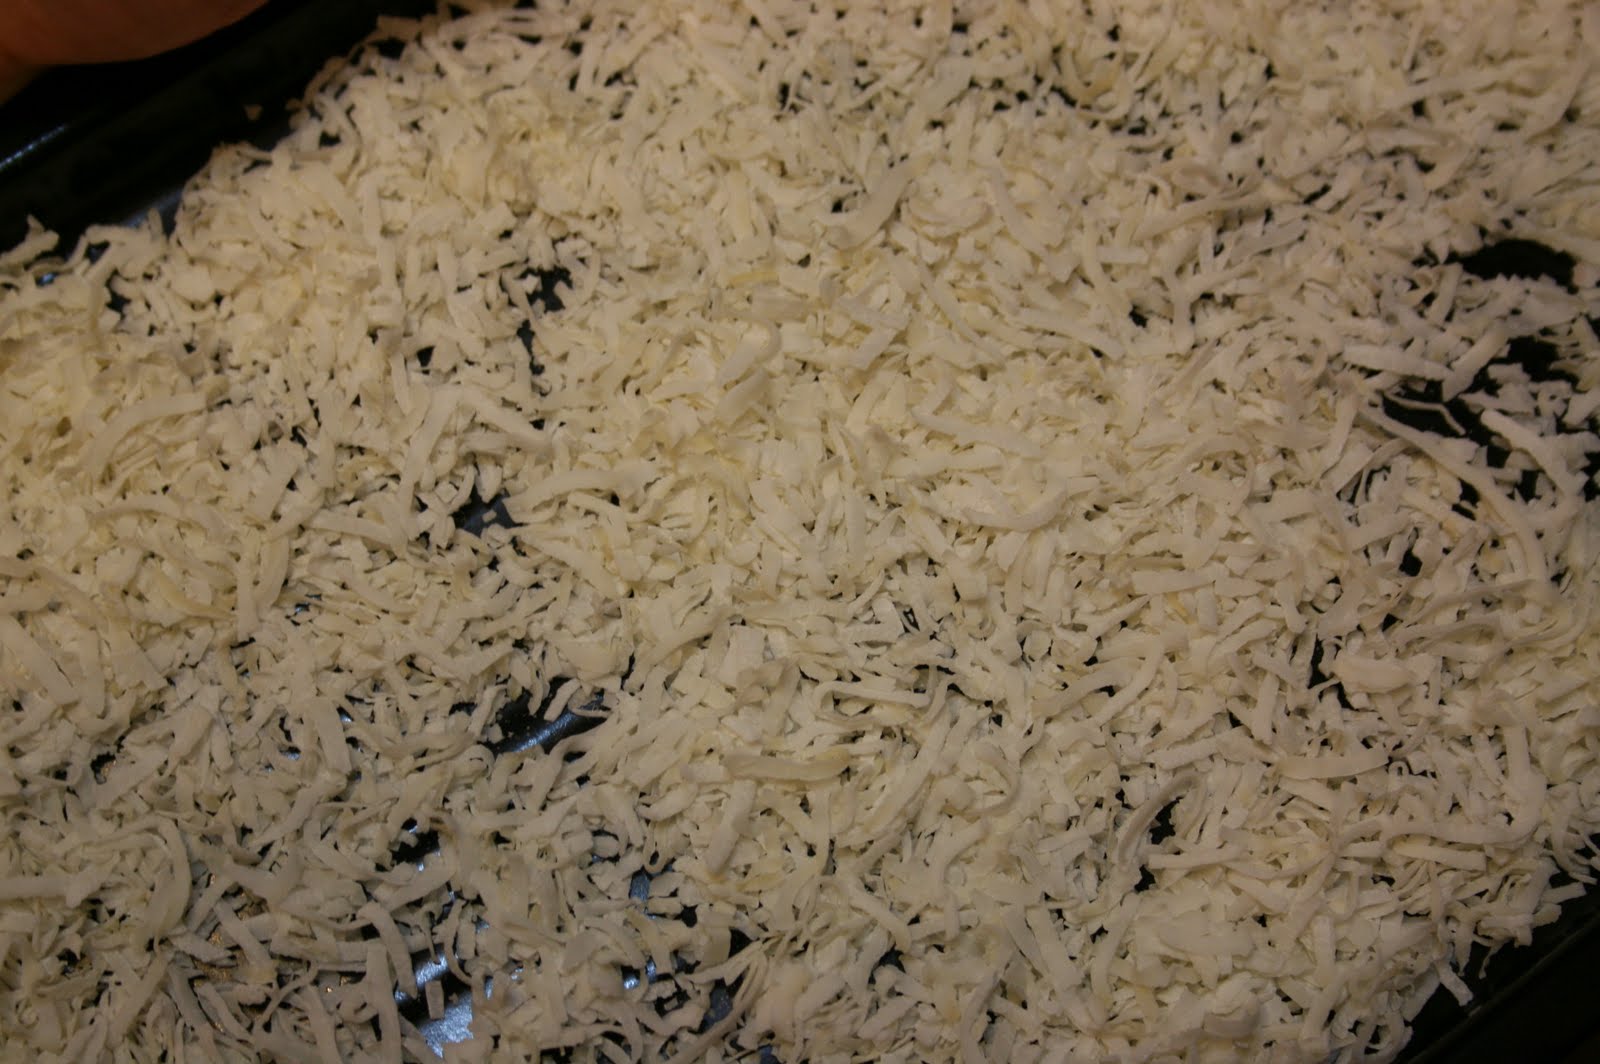
While you are still waiting for the cake you can toast the coconut. Watch it closely (I burned the first batch).
 Put about a cup and a half coconut onto a baking pan. Toast at 325F. for maybe 5-10 minutes, until it begins to appear golden.
Set this aside for a few minutes until cool or the frosting will melt if you put it on while warm.
When the frosting base is completely cooled (and not until!), beat in the butter until light and fluffy. Beat in the granulated sugar until all graininess is gone. Add vanilla.
Mmmm, so light.
 Spread evenly over surface of cooled cake.
 Sprinkle with the coconut.
So there you have it, chocolate, light, creamy frosting and coconut--does it get any better than that?
 My daughter made me promise to make this again, soon!
Make sure you get a piece!

Wednesday, November 16, 2011

Chunky Apple and Peach Snack Cake

This little cake surprised me. It is packed with so much flavor, peach and apple chunks, orange juice and zest, with less sugar than most cakes. I used butter and coconut oil so it has good fats with a lovely texture, and part whole grain.
Definitely one to try!
I used 2  8x8inch baking dishes because I was giving one away and wanted one for my own little family. It will also work perfectly in a 9x13inch baking dish or muffin pans.
Fruit mixture:
1 large apple, not too tart, peeled, diced
1 1/2 cups chopped fresh or frozen peaches
2 tablespoons sugar mixed with 1/2 teaspoon cinnamon
Dry ingredients:
2 cups all purpose flour (I used white spelt)
1 cup whole grain wheat or spelt
2 teaspoons baking powder
3/4 teaspoon salt
1/4 teaspoon baking soda
Wet ingredients:
1/3 cup orange juice
zest of 1 orange
1/2 cup butter, melted and cooled
1/2 cup coconut oil, melted and cooled
4 eggs
1 1/3  cups sugar
2 teaspoons vanilla extract
Grease pans generously then set aside.
Preheat oven to 350F.
After chopping the fruit, toss together with the cinnamon and sugar mixture. Set aside.


In a large bowl, stir together all the dry ingredients.
In a small bowl, stir together all the wet ingredients.
Add the wet to the dry, do not over mix or the cake will be tough.
Gently stir the fruit mixture into the batter.
Spread into pans, if using muffin pans fill each cup to 2/3.
Bake for 40 minutes, 20 for muffins, test with a toothpick inserted into the center, when it comes out clean it is done.
You can sprinkle the finished cake with more of the cinnamon/sugar mixture or dust with confectioner's sugar.
Enjoy!

Thursday, November 10, 2011

Cheesy Garlic Biscuits

These lovely, tender biscuits are packed with the flavors of cheddar cheese, garlic and butter. The original recipe came from a war time cookbook my grandmother kept on the shelf. I have substituted fresh milk and butter for canned milk and oleo. I call it revisionist history/cooking. That is a joke...okay?
 The bottom line is this, the biscuits are super with any kind of meal or just a big salad. Try them!
2 cups sifted all purpose or white spelt flour
3 teaspoons baking powder
1 teaspoon salt
4 tablespoons butter, cold, cut into small chunks
1 cup milk
1 large clove garlic, minced
1 tablespoon parsley flakes
2 tablespoons butter, melted
1 cup finely shredded medium to sharp cheddar cheese
Preheat oven to 450F. Lightly grease a baking sheet.
In a large bowl, mix the flour, baking powder, salt.
 Cut in the butter with a pastry blender or a fork

until it looks like coarse crumbs.
Add the garlic, I used a press this time instead of mincing, either works well.
Stir in the cheese.

Add the milk, stirring just until combined. Do not over mix or the finished product will be tough and chewy.
Drop by spoonfuls on to the baking sheet.

 Bake 12-15 minutes until golden. While baking, stir the parsley into the melted butter.
Brush the biscuits with the butter mixture as soon as they come out of the oven.

Break one open, start nibbling, you won't be sorry.