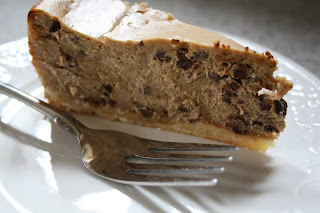
We had this for my birthday, wow, it was so yummy! Smooth, creamy, not too sweet, perfect like a good cup of coffee and then some.
I used a pate sucree crust that you will find on the White Chocolate Blueberry Cheesecake recipe (on this blog, http://hearthandhospitality.blogspot.com/#uds-search-results ), this, in my humble opinion, is the perfect crust for most cheesecakes. It is easy to make, very tender and delicious.
Fond memories, it was so good while it lasted, mmmmm happiness.
Because this was going to be served in the evening, I used decaf instant coffee in the batter, I like to go to bed at a decent hour and if my son is not in bed then I can't go to bed, and if there is cheesecake he will be the first in line for as large a piece as he can beg. There are only two kinds of instant coffee I like Starbucks Via (did you see that coming ;) and Trader Joe's instant decaf. I prefer the former but enjoy the latter too. I dissolved the coffee granules in hot water so there wouldn't be flecks in the batter.
Crust:
Prebaked crust http://hearthandhospitality.blogspot.com/#uds-search-results
Batter:
3 8oz. packages cream cheese, softened to room temperature
3/4 cup sugar + 2 tablespoons
3 eggs
1 teaspoon vanilla
3 heaping tablespoons instant coffee or espresso powder dissolved in 2 tablespoons hot water
6 oz. mini semi sweet chocolate chips
Preheat oven to 450F.
In a large mixing bowl, beat cream cheese until fluffy. Add sugar and beat another minute or two. Add eggs one at a time, beating well after each addition. Add vanilla and coffee.
Give it a good mixing so it is well incorporated and there are no streaks. Stir in chocolate chips.
Pour batter into crust.
Bake at 450F. for 10 minutes then turn oven to 250F. for an additional 40 minutes. I should be jiggly but not loose or liquid.
Cracks are okay, it happens. That's the white chocolate blueberry cheesecake beside it, yummy.
Now, while I have been sitting here typing, I have been wondering why I didn't put the other half of the bag of chocolate chips on the bottom of the crust, hmmm. You could also spread a chocolate ganache on top of the baked cheesecake. If you have more ideas please share them!
Until next time, it's salad for me for a week!
Wednesday, September 28, 2011
Thursday, September 22, 2011
Caprese Toast Bites
I was having a big green salad with chicken for dinner and wanted something really tasty to go with it.
Slice a good loaf of bread, French would be ideal but this was a loaf of potato bread I made earlier in the week, very rich but airy.
Top with these:
fresh mozzarella
basil
tomatoes
olive oil
I drizzled a bit of olive oil on the bread,
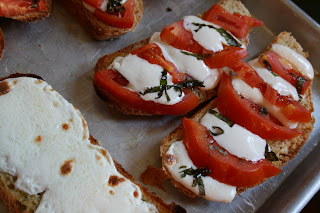
then arranged the tomato, cheese and basil on top.
Another drizzle of olive oil on top of the tomatoes.
I purchased an empty spray bottle quite some time ago and keep it filled with good extra virgin, cold press olive oil for things like this, makes it so easy to just shoot a little where ever I want it.
Place under the broiler for 2-4 minutes or until the cheese is melted and the bread begins to brown and get crisp at the edges.
The one without tomatoes is for my son, he thinks they are evil....where do they get these ideas?!
Yum, go make these while the tomatoes are abundant and aromatic.
I might need more than one...
Thursday, September 15, 2011
Orange Upside Down Coffee Cake
This had to be the best coffee cake I have ever made. I pulled out an old recipe from a Williams-Sonoma book and did some tweaking.
Buttery, brown sugar and oranges on top (bottom, it is an upside down cake) of a light, airy cake. This was so good on it's own when my daughter and I had a test piece but went over the top later and served it with vanilla ice cream.
The recipe has several steps but nothing is difficult, go for it!
First, here are the ingredients:
5 oranges
12 tablespoons packed brown sugar
6 tablespoons melted butter
1/2 cup softened butter
1/2 cup granulated sugar
2 large eggs
1 cup flour, I used spelt but all purpose is good
1 teaspoon baking powder
1/2 teaspoon baking soda
1/4 teaspoon salt
1/4 cup freshly squeezed orange juice
1/4 cup heavy cream
1 teaspoon vanilla extract
Prepare the oranges like this:
Zest 1 orange, set aside the zest and refrigerate the rest for juice or something else later (waste not want not).
Cut off the top and bottom of 4 oranges,
then remove the rest of the skin and pith by slicing carefully down each side.
Now, holding the orange, in one hand (while juice runs down your arm to your elbow), slice at each side of the segment membrane.
It looks like a circular accordion.
This little "leftover" has juice in it so just squeeze it into a glass measuring cup and after all four of them you should have at least the 1/4 cup you need for the batter.
Set both the segments and the juice aside.
Butter a 9" springform pan or a 9" cake pan and set aside.
Preheat the oven to 350F.
Mix the dry ingredients, flour, baking powder, baking soda and salt, set aside. Have you run out of counter space yet with all these things at the side?
Put the brown sugar into the buttered pan,
drizzle the melted butter over the brown sugar.
Arrange the orange segments on top of the butter...set aside.
Cream the 1/2 cup soft butter with the granulated sugar and orange zest. This had a beautiful yellow color.
Beat in the eggs. Add the juice.
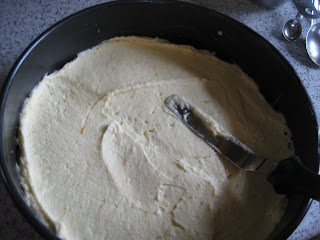
Fold in the dry ingredients, followed by the cream and vanilla. Spread this over the oranges.
Bake for 40 minutes or until golden and not jiggly. A toothpick inserted in center should come out clean when done.
Allow to cool in the pan for 15 minutes.
Run a knife around the edge of the pan to loosen the cake, if using a springform, remove the outer ring. Place a serving plate on top of the pan, then invert and remove pan. Be careful if it pulls a bit you might need to loosen more with a table knife.
Serve warm with ice cream or a drizzle of heavy cream.
It was just as good the next day, still very moist, with a light orange flavor.
That piece was mine..."Give her to eat of the fruit of her hands." Proverbs 31:31a
Buttery, brown sugar and oranges on top (bottom, it is an upside down cake) of a light, airy cake. This was so good on it's own when my daughter and I had a test piece but went over the top later and served it with vanilla ice cream.
The recipe has several steps but nothing is difficult, go for it!
First, here are the ingredients:
5 oranges
12 tablespoons packed brown sugar
6 tablespoons melted butter
1/2 cup softened butter
1/2 cup granulated sugar
2 large eggs
1 cup flour, I used spelt but all purpose is good
1 teaspoon baking powder
1/2 teaspoon baking soda
1/4 teaspoon salt
1/4 cup freshly squeezed orange juice
1/4 cup heavy cream
1 teaspoon vanilla extract
Prepare the oranges like this:
Zest 1 orange, set aside the zest and refrigerate the rest for juice or something else later (waste not want not).
Cut off the top and bottom of 4 oranges,
then remove the rest of the skin and pith by slicing carefully down each side.
Now, holding the orange, in one hand (while juice runs down your arm to your elbow), slice at each side of the segment membrane.
It looks like a circular accordion.
This little "leftover" has juice in it so just squeeze it into a glass measuring cup and after all four of them you should have at least the 1/4 cup you need for the batter.
Butter a 9" springform pan or a 9" cake pan and set aside.
Preheat the oven to 350F.
Mix the dry ingredients, flour, baking powder, baking soda and salt, set aside. Have you run out of counter space yet with all these things at the side?
Put the brown sugar into the buttered pan,
Arrange the orange segments on top of the butter...set aside.
Cream the 1/2 cup soft butter with the granulated sugar and orange zest. This had a beautiful yellow color.
Beat in the eggs. Add the juice.
Fold in the dry ingredients, followed by the cream and vanilla. Spread this over the oranges.
Bake for 40 minutes or until golden and not jiggly. A toothpick inserted in center should come out clean when done.
Allow to cool in the pan for 15 minutes.
Run a knife around the edge of the pan to loosen the cake, if using a springform, remove the outer ring. Place a serving plate on top of the pan, then invert and remove pan. Be careful if it pulls a bit you might need to loosen more with a table knife.
Serve warm with ice cream or a drizzle of heavy cream.
It was just as good the next day, still very moist, with a light orange flavor.
Wednesday, September 7, 2011
Juicing, Micro Nutrient Quick Upload
Years ago a friend started me juicing. I purchased a small, cheap (yes, cheap as in flimsy) juicer and started with carrots and apples. After a while I got brave and added in some spinach and other vegetables. My children and I lovingly referred to it as "Mom's swamp juice", they stuck to fruit with an occasional stray carrot, but only under duress. This is also a good way to get fruit and vegetables into your picky eaters, start them on apple juice and add a small chunk of carrot every day until they ask you why their apple juice is orange.
I upgraded my juicer when my friend purchased a newer model and sold her yellow, Champion Juicer to me. One of the wisest purchases I have ever made, I don't remember how long she had it but I have been using it for more than a dozen years without one problem. Truly a superior product.
Despite knowing all the health benefits and feeling them, I would get tired of cleaning the juicer parts and put it back in the pantry for a while. A few weeks, sometimes months, I would begin to feel tired and run down again so out came the juicer. Sometimes I am a bit slow, G-d promises us abundant life but how can we enjoy it if we are not as fit and healthy as we can be?
There are so many benefits to juicing but the "long and short" of it is this, you get a mass quantity of highly absorbable nutrients in one glass of juice. For instance, this is the amount of veggies I had in my glass this morning.
3 cups of kale and spinach
3 carrots
2 apples
1 cucumber
2 stalks celery
2 cloves garlic
1 small piece ginger
Prior to me putting all the green stuff through the juicer, my son juiced 3 apples and a carrot.
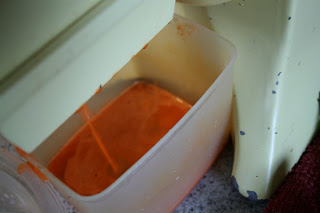
That means that before he ate anything else for breakfast he already had the nutrients in three apples and one carrot absorbing straight into his body. Cleansing, physical and mental energy, healing...and so much more.
This truly tastes so much better than it looks. Isn't it a pretty color?
I use a straw because I don't want an orange or green mustache.
Where is my super cape, I feel so good!
This goes in the composter so the garden is super charged too.
Now, go conquer the world or at least your little part of it!
Subscribe to:
Posts (Atom)


